Because the Canon PIXMA MG3022 is a small all-in-one printer, it just has the necessary size and functions. With features such as Auto Power On, Built-in WiFi, and PECMA Cloud Link, it’s simple to understand why PIXMA printers are so user-friendly. The hybrid ink technology combines colour ink for vibrant colours with black pigment ink for sharp, clear lettering. It is quite simple to connect your computer to your Canon MG3022 printer using WiFi. This article explains how to set up a wireless network using the WPS data link.
If you own a Canon MG3022 printer, you must look for the wifi settings of this printer on the Internet so you can connect it. Then you must decide if your PC will run Windows, Linux, Mac, or another operating system. If you want to connect your printer to a laptop via a wireless network, you should know two things:
- Check that your printing has a real WPS button and that the access point is Wi-Fi secured. You may find it in the user instructions for your printer.
- Because most WPSs utilise this protocol, your Internet connection should employ safe access to Wi-Fi (WPA) or perhaps WPA2 with security protocol.
In This Article
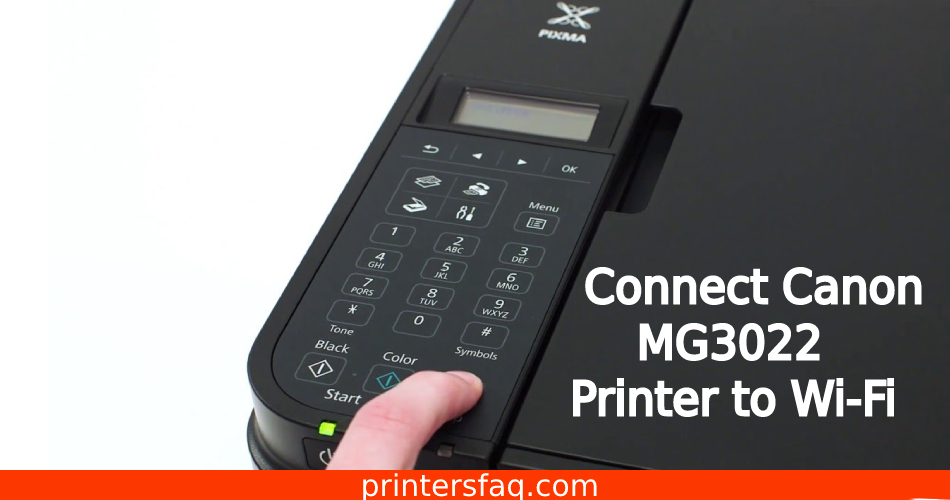
How to Connect a Canon MG3022 Printer to Wi-Fi
- To begin, switch on the printer. Hold down the Wi-Fi key until the warning light illuminates. Check that the blue light is shining.
- For 2 minutes, turn on the WPS switch on your access point. The colour blue While looking for your access point, Flash will continue to flash.
- The light turns and Wi-Fi will blink once it is linked to the access point.
- If the operation is successful, the electric and Wi-Fi lighting will stop napping and remain on.
- To test whether the operation was successful, print the network settings of your printer.
- Place a piece of paper.
- Release the resume/cancel button once the indication lamp flashes 15 times.
- The network information page will be printed by your printer, indicating that the setup was successful.
- Both signs turn off when your printer is linked to your internet connection.
Verify your Canon MG3022 WiFi configuration.
- You may print your document for testing to ensure that your printer is linked to your internet connection, which is the final step in Canon’s wifi configuration for Windows printers.
- Check that your printer is turned on.
- Check the “connection” setting on your printer to ensure that it is “active.”
- Verify the name of your internet connection; is it the right wireless name?
- Fill the tray with any kind of paper.
- Hold down the [Start over or cancel] button until the light flashes up to 15 times, then release it.
- Your evaluation paper will be printed.
How to Easily Connect a Canon Printer to WiFi
Part 1: Attach my Canon printer to my wireless network.
Following these instructions should make attaching your Printer device to your WiFi as simple as pie:
1) Turn up your printer by pressing the power button.
2) Select the Settings option. Then, after you’ve reached the Device settings screen, tap OK.
3) Hold down the arrow button until you find LAN Settings, then hit OK.
4) Hit the arrow button until you reach the wireless LAN configuration screen, then press OK.
The printer will begin looking for a WiFi network, while the LED will flash.
5) If the search procedure takes too long, hit Stop to return to wireless LAN configuration, normal setup. Click OK.
6) Hold down the arrow button until you discover your WiFi network, then hit OK.
7) Enter your WiFi password (Enter passcode) and hit OK.
8) One the screen reads Connected, press OK once more.
Part 2: Connect your wifi Canon printer to your PC
To get our Canon printer to operate after connecting it to WiFi, we may need to add it to our computer. Here’s how it’s done:
1) On your keyboard, simultaneously hit the Windows logo key and R. Then, in the box, paste control /name Microsoft.DevicesAndPrinters and click OK.
2) To finish the procedure, click Add a printer and follow the on-screen directions.
You’ve now finished attaching your printer to your wireless network. It should work if you print a test page.
Part 3: What to Do If You Printer Doesn’t Work
If your Canon printer behaves strangely, say:
- Error messages appear at random, printing fails, and so forth.
You most likely have an outdated or faulty printer driver. As a result, you should refresh your printer software to see if it resolves your issue. If you don’t have the time, patience, or expertise to manually update the driver, Driver Easy can do it for you.
Driver Easy will detect your system and locate the appropriate drivers for it. You don’t need to know what operating system your computer is running, you don’t need to risk downloading and installing the wrong driver, and you don’t need to worry about installing incorrectly. Driver Easy handles everything.
With either the FREE or Pro versions of Driver Easy, you can automatically update your drivers. However, the Pro version requires only two actions.
1) Get and set up Driver Easy.
2) Launch Driver Easy and select the Scan Now option. License Key will then check your computer for problematic drivers.
3) Select Update All to instantly install and download the proper version of ALL missing or out-of-date drivers on your machine.
4) Reboot your computer to apply the changes.
5) Verify that the printer is operational.
By now, you should have successfully linked your Printer device to the WiFi network. Please leave any questions, thoughts, or recommendations in the comments section. Thank you for your time!
Methods for Connecting a Canon Wireless Printer to a WiFi Network
There are three simple methods for connecting any Canon wirelessly printer to a wireless network.
- WPS Push Button Mode
- Wireless Connect Button
- Wifi Connect Mode Manual
- Wireless Connect Button Technique
This wireless connection technique is utilised for Canon printers that lack a Settings Icon and only have a Wireless Start Button. However, you may connect your Canon printer to wifi using this wireless connect button. To set up a Canon printer wirelessly, follow these instructions.
- For 2-3 seconds, hold and press the Direct or Wifi Connect key on the Canon printer.
- The Wireless symbol on the printer display now begins to flash.
- Download the Canon Print Inkjet App from the Google Play or App Store on your smartphone.
- Now, go to your smartphone’s WiFi settings and join the Canon printer listed there.
- Launch the Canon Print Inkjet App and select the Add Printer Icon.
- Select the Car selection method by clicking on Register Printer.
- Now, choose your WiFi name and enter your WiFi password.
- This will enable your Canon printer to connect to the wireless network.
- WPS Push Button Mode
Similarly, we’ll go through how to link Canon printers to a wireless connection using the WPS Push button approach in this way. Let’s get this party started!
- To begin, ensure that your Canon printer has been turned on.
- If the Green energy light blinks, push the Stop button.
- Hold down the Wireless key until the icon begins to flash.
- Now, on the router, hold down the WPS button for 5 seconds.
- Allow 1-2 minutes for the connection to finish.
- The Wireless Flashing symbol on the display stops flashing, indicating that the connection has been established.
- Now, download and install the drivers on your PC.
- Congratulations! Your Canon bluetooth printer is linked to the internet.
- Wifi Connect Mode Manual
If your router lacks a WPS button, you may use this direct wifi connection method to connect the Canon printer to the internet.
- On the printer, press the Configuration or Settings button.
- Navigate to Wifi Setup>Manual Connect>Router Name.
- Now, choose your network and enter the password before clicking OK.
- Go to your laptop and install the printer drivers.
- To install the drivers successfully, follow the instructions on the computer screen.
- Hurray! Your Canon printer is linked to your wireless router.
Please keep in mind that these procedures are utilised to wirelessly connect any Canon printer. If you are still having trouble connecting the printer, please contact Canon Help for assistance.
Quick Repair Options for Wireless Printer Connectivity Issues
When you call tech support, there may be some simple fixes you can try to save time and money.
For example, if your device continues disconnecting from your printer or is not synchronising properly, you can attempt the following fixes to resolve the problem:
- Place your printer close to your WiFi router. The position of your printer should not be too far away, and any interferences that may be impeding the WiFi signal should be removed.
- Reset your usual connections, especially if you’ve just updated your device’s firmware.
- Examine the toner and paper in the printer. Sometimes printing problems occur, causing bottlenecks in the printing line.
- When connected to the printer, try a different device.
- Use the USB connection if possible.
Don’t be concerned if you put forth a lot of effort to connect and the connection fails. There are several solutions to this problem, and all you need is some perseverance.


