We are all aware of how the printer facilitates our job. A printer is a gadget that may be used both at home and in the business. Among all the many companies’ printers, the Dell Printer is one of the greatest products that is commonly used in many businesses for commercial purposes. Dell Printers, like other devices, have a unique IP address. Because this IP address assists us in resolving issues when the Dell Printer stops operating. As a result, everyone should know how to discover the Dell printer IP address.
However, some of you are aware of how to verify the IP address of a Dell printer. Keeping this in mind, we’ve put up a step-by-step guide to help you get the Address of your own Dell printers. Furthermore, the material in this essay is written in straightforward, layman’s English. Finding the Dell Printer IP Address is not a difficult process. All you have to do is carefully follow these guidelines to see your Dell Printer’s IP address on the Monitor screen in a few minutes.
In This Article
- 1 Method 1: ARP Lookup How to Find Your Dell Printer’s IP Address Using a Table
- 2 Method 2: Lookup Network Router How to Determine Your Dell Printer’s IP Address
- 3 Method 3: Using the Command Prompt
- 4 Connect a Dell printer to a wireless network using an installation Disc:
- 5 How do I connect a Dell printer to a wireless network without a CD in Windows?
- 6 How to Install a Printer on a Dell Laptop?
- 7 Learn how to find your Dell printer’s WPS pin!
- 8 How do you find the IP address of a Dell printer?
- 9 How can I connect my Dell e310dw printer to my wireless network?
- 10 Determine the IP Address of Your Printer
Method 1: ARP Lookup How to Find Your Dell Printer’s IP Address Using a Table
- To begin, ensure that your PC or Laptop is turned on and that it is linked to the Internet.
- The next step is to click on the “Start” Click on your monitor screen, type “cmd” in the search bar located near the Start button, and then hit enter after typing “cmd” in the search box.
- Enter ‘ipconfig’ into the search field and press the ‘Enter’ key. So you can view or check your IP address and a few other facts about your network connection. You can see your computer’s IP address, which is shown next to “IPv4”.
- Following that, type “ping” accompanied by your Dell Printer IP address and click the Enter key.
- To display a list of devices that are linked to your network connection, type “arp-a” and press Enter. You may also find the IP address of each device linked to the network you use.
Method 2: Lookup Network Router How to Determine Your Dell Printer’s IP Address
- As with Method 1, go to the “Start” Button, put “cmd” in the search field, and then press the Enter Key.
- Then, at the command prompt, run “netstat-r” and hit the “Enter” key to get the Dell Printer IP Address. You may also view the various devices that are linked to your
network.
Method 3: Using the Command Prompt
Step 1- To open the “Run” dialogue box, press the Windows key and the “r” button simultaneously.
Step 2- Launch the command prompt by entering “cmd” into the “Run” dialogue box.
Step 3- In the prompt window, type “ipconfig” and hit “Enter.” This will launch the Windows IP Configuration utility. To get your IP address, scroll down to “Ethernet adapter Local Area Connection.” This will not work if you are linked to a router (or a wireless router through Wi-Fi); you must be connected directly to the modem. If you are behind a router, you will only see the router’s IP address, not the IP address of your personal computer.
Connect a Dell printer to a wireless network using an installation Disc:

Dell printers include a wireless connection capability that allows you to send print commands without requiring a USB cable. However, connecting a Dell printer with the installation CD might be difficult. So, here are a few fast and easy steps to connect your Dell printer to your WiFi:
- Start your printer.
- Turn on your computer and connect it to your wireless network.
- Install the Software CD that comes with your Dell printer.
- Accept the License Agreement’s conditions.
- Follow the CD’s guided instructions.
- Finish the procedure
- Fill the paper trays and cartridges.
- Remove the USB cord.
You have successfully set up your Dell printer using a CD and resolved how to connect the Dell printer to the computer after following these steps of connecting the Dell printer to Wifi. Continue reading to learn how to install a Dell printer without a CD!
How do I connect a Dell printer to a wireless network without a CD in Windows?

If you do not have the software CD, you can connect the Dell printer without it. You may quickly add the Dell printer to the wireless network by visiting the website. Follow the instructions below to learn how to:
- Press the Start button.
- Then choose the Control Panel.
- In your Control Panel, double-click Devices and Printers.
- It’s known as Printers in Windows.
- Choose Add a printer.
- Select the Add a Wireless or Networking Printer tab.
- Windows will look for printers on your network.
- Choose your printer from the drop-down menu.
- If the Add Printer Tutorial appears, pick the manufacturer model of your printer and click OK.
- Finish by clicking the Finish button.
To connect a Dell printer to a wireless network using Microsoft Windows, follow the procedures outlined above:
How to Install a Printer on a Dell Laptop?

Add your printer to your Dell laptop so that you don’t have to go through the setup procedure every time you need to print. Follow these steps to simply install a print job on your Dell laptop:
- Use the USB cord to connect the computer to the printer.
- Please activate it.
- Launch the Settings app.
- Select Devices.
- Click Install a printer or scanner.
- If Windows recognizes your printer
- Select your printer by clicking on its name.
- To complete the guided steps, follow the on-screen directions.
By following these instructions, you’ve learned how to connect a printer to a Dell laptop!
Learn how to find your Dell printer’s WPS pin!
WPS is your router’s wireless connection pin that allows you to connect to your device. It aids in preventing an unneeded third party from accessing your network. How can I locate the WPS pin on my Dell printer?
- To begin, ensure that your computer is linked to WiFi.
- Turn on your gadgets.
- Click Install a New Printer
- Click the Continue button.
- Choose your printer, then click Continue.
- Enter your WPA password.
- Click on ‘proceed,’ then on ‘exit.’
You can discover the WPS on your control centre by typing “Find WPS,” and you may reset it if you have forgotten.
How do you find the IP address of a Dell printer?
IP addresses are useful if you want to connect to and use an unknown device. So, if you want to connect to a new device, you’ll need IP addresses to see if it’s a good fit. Here’s an easy way to determine the IP address of your Dell printer!
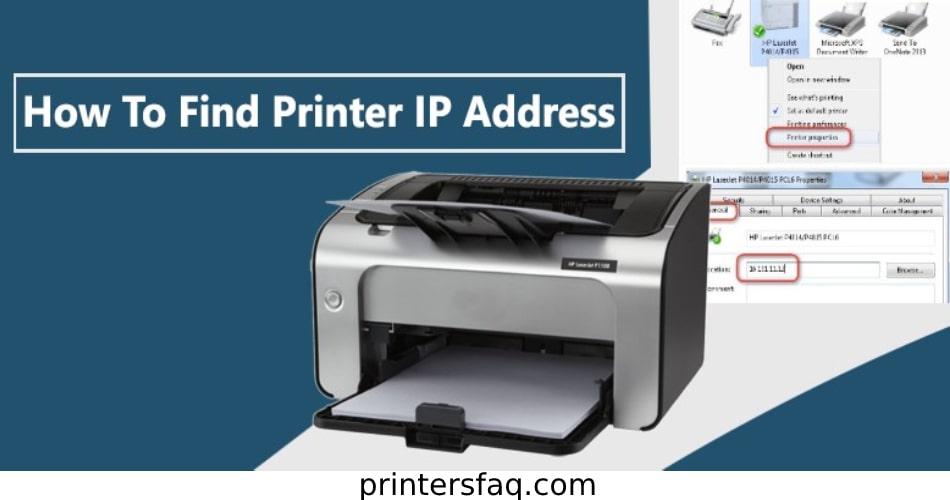
- Click on Start, then choose Control Panel, and finally Printers.
- Select properties by right-clicking your printer.
- Navigate to the Ports section.
- You will discover your printer’s IP address.
And you’ve just learnt how to locate the IP address of a Dell printer in a few simple steps! So, follow the instructions above to learn how to add printers to Dell laptops in a few quick and easy steps, but if you have any questions about how to add printers to Dell laptops, contact specialists!
How can I connect my Dell e310dw printer to my wireless network?
You can easily connect Dell’s E310DQ printer to WiFi, and we’ve written down the necessary steps for a speedy setup for your convenience. As long as you are within the printer’s radius, follow these guided procedures to connect and access your printers. How Do I Connect My Dell E310DW Printer to WiFi?
Using your wifi’s WPS button:
- To begin, make sure your WLAN access point/router enables WPS or AOSS.
- Using the up-and-down arrow keys
- Select the ‘Network’ option.
- Then click OK.
- Select the WLAN option now.
- Click OK.
- Select the WPS/AOSS option.
- Click OK.
- The option to enable WLAN should then appear.
- Select WPS.
- Connect your printer to the internet through WiFi.
- Following the procedures outlined above, you will be successfully linked!
Using the Setup Wizard in the Printer’s Control Panel:
- First, make a note of your Network name (SSID)
- Make a note of your Connection Key (Password) and keep it close to hand.
- Pick the Network option with the arrow keys.
- Then click OK.
- Select WLAN and then hit OK.
- Select the Page Setup option now.
- Click OK.
- Where WLAN Enable displays, choose the ON option.
- Now your printer will look for your network.
- It will provide a list of all accessible SSIDs.
- Choose the desired SSID from the presented list.
- Then click OK.
- Enter the Network Key now (Password).
- Your printer will now be linked to your wifi when you pick it.
- You may now issue the print command and you’re done!
This is how you connect your Dell e310dw printer to WiFi! I hope this was helpful, and if it wasn’t, make sure you get in contact with the professionals for any questions!
Determine the IP Address of Your Printer
You may also determine your printer’s IP address by utilising the printer’s display and buttons. However, you will most likely need to reference your printer’s manual to do so. The majority of network-connected printers have a tiny screen and a menus button for examining status and altering settings. Look for choices like “Network” and “Info,” “Status,” or “IP Address” while exploring the menus on the screen. Best wishes, and happy printing!


